
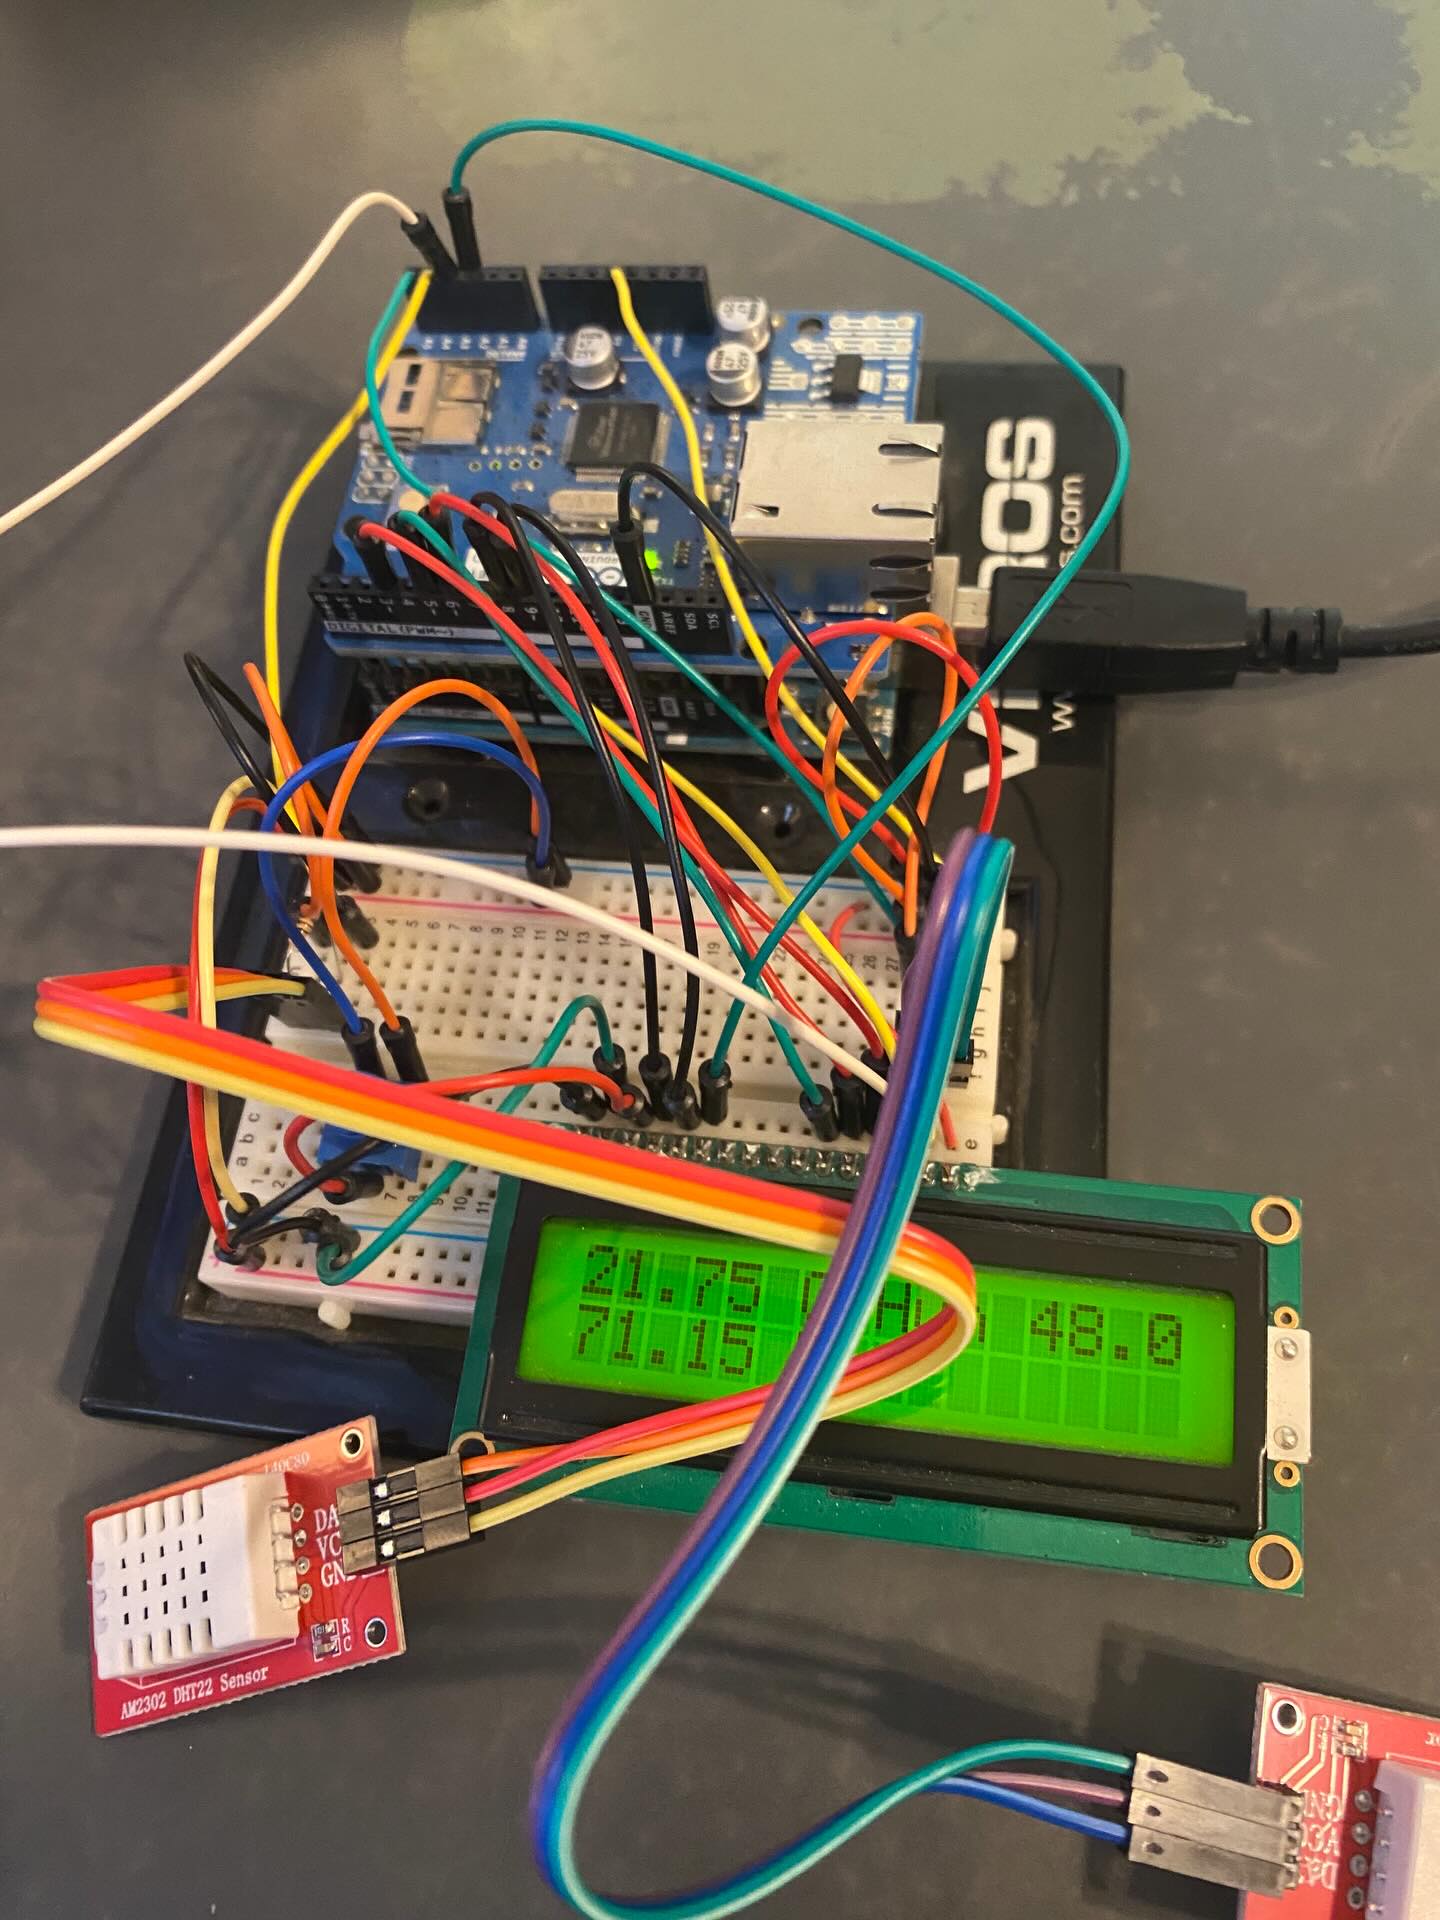
The firmware treats the LCD and the JSON feed as two views of the same data. The LCD gives instant local feedback while you install or troubleshoot probes; the Ethernet interface publishes the same readings to the website and any other HTTP clients.
Reading two DHT22 sensors independently
Each DHT22 exposes temperature and relative humidity over a single-wire data protocol. Because each sensor has its own data pin (A4 and A5 in this build), the sketch can poll them sequentially without bus collisions. That is why the LCD shows two distinct pairs—such as 21.75 °C with 71.15% humidity on one line and a different temperature on the next—rather than a single averaged local value.
On the website, those same probes map to JSON keys (for example 0, 1, and
avg). Labels you assign in the dashboard can rename them “North wall” and “Door zone”
without changing firmware keys.
Three-wire sensor connections
- Data — one digital pin per sensor, with a pull-up resistor as recommended by the DHT22 datasheet.
- VCC — 5 V from the breadboard rail (stable supply matters for consistent readings).
- GND — common ground with the Arduino, LCD, and Ethernet shield.
Long cable runs to remote probe locations may need twisted pairs or shielding; the garage build keeps sensors near the controller for simplicity, but the same firmware pattern scales to wired remote probes.
LCD layout and contrast
The 16×2 display shows live values during boot, calibration, and network outages. The contrast potentiometer on the breadboard adjusts V0 so text remains readable across temperature swings in the garage. If the screen looks blank after upload, adjust contrast before debugging code.
Four-bit mode (D4–D7 only) reduces pin usage compared with eight-bit wiring—important when Ethernet already consumes SPI pins and two DHT22 data lines are allocated.
Backlight control
Driving the backlight from pin 7 through a transistor keeps current draw off the Arduino pin itself. Firmware can dim or flash the backlight for warnings—useful when a probe reads below freezing—without blocking network serving.
Ethernet alongside sensors
The W5100 Ethernet shield stacks on the Uno and uses SPI, leaving digital and analog pins free for the LCD and DHT22 wiring described in the pin-level guide. The shield mostly “rides along” on the stack: once configured, the sketch serves JSON over HTTP while continuing to refresh the LCD each loop.
From LCD numbers to website JSON
After each successful sensor read, the sketch updates the LCD and builds the JSON document served to clients. The website fetches that JSON, stores optional history when you are signed in, and renders the same probe keys on the home page. Try the interactive probe demo to see how multiple keys and averages appear to downstream consumers.